
 Pin to Favorites
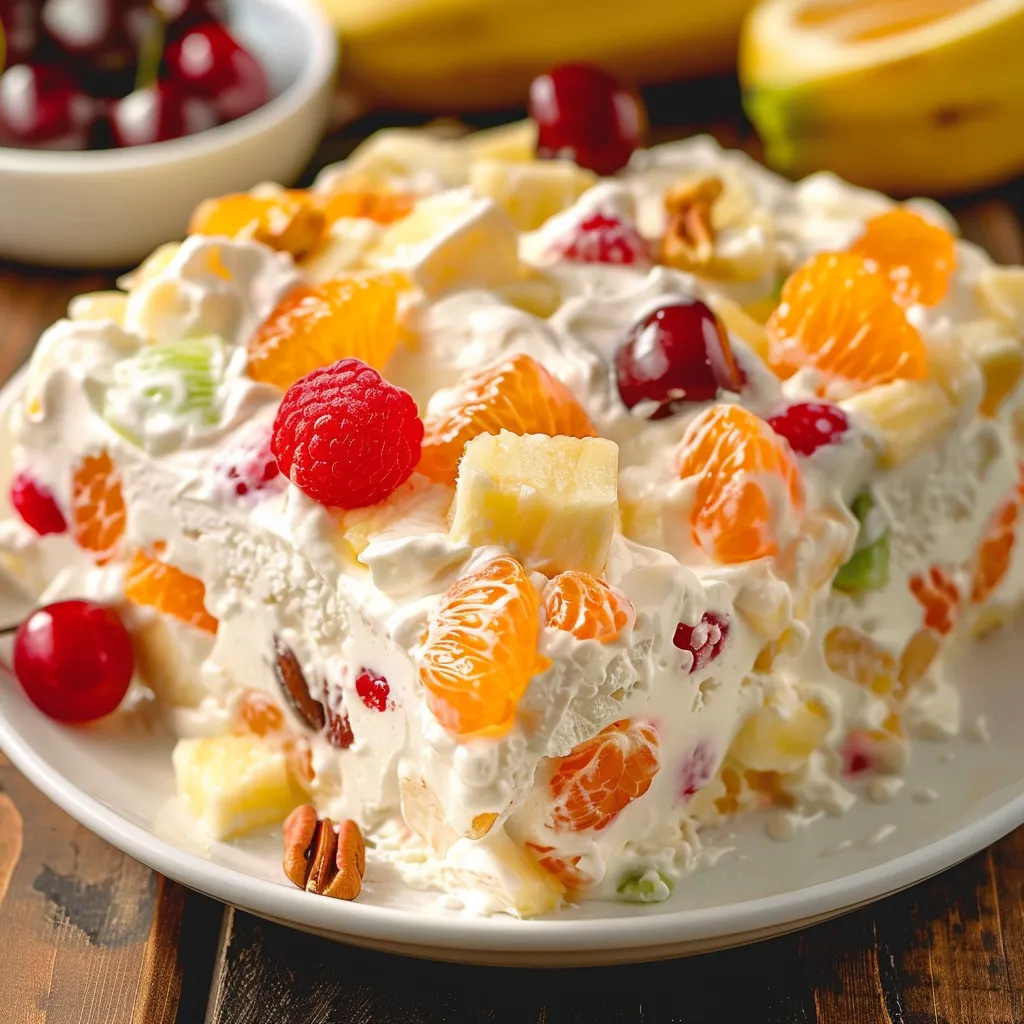
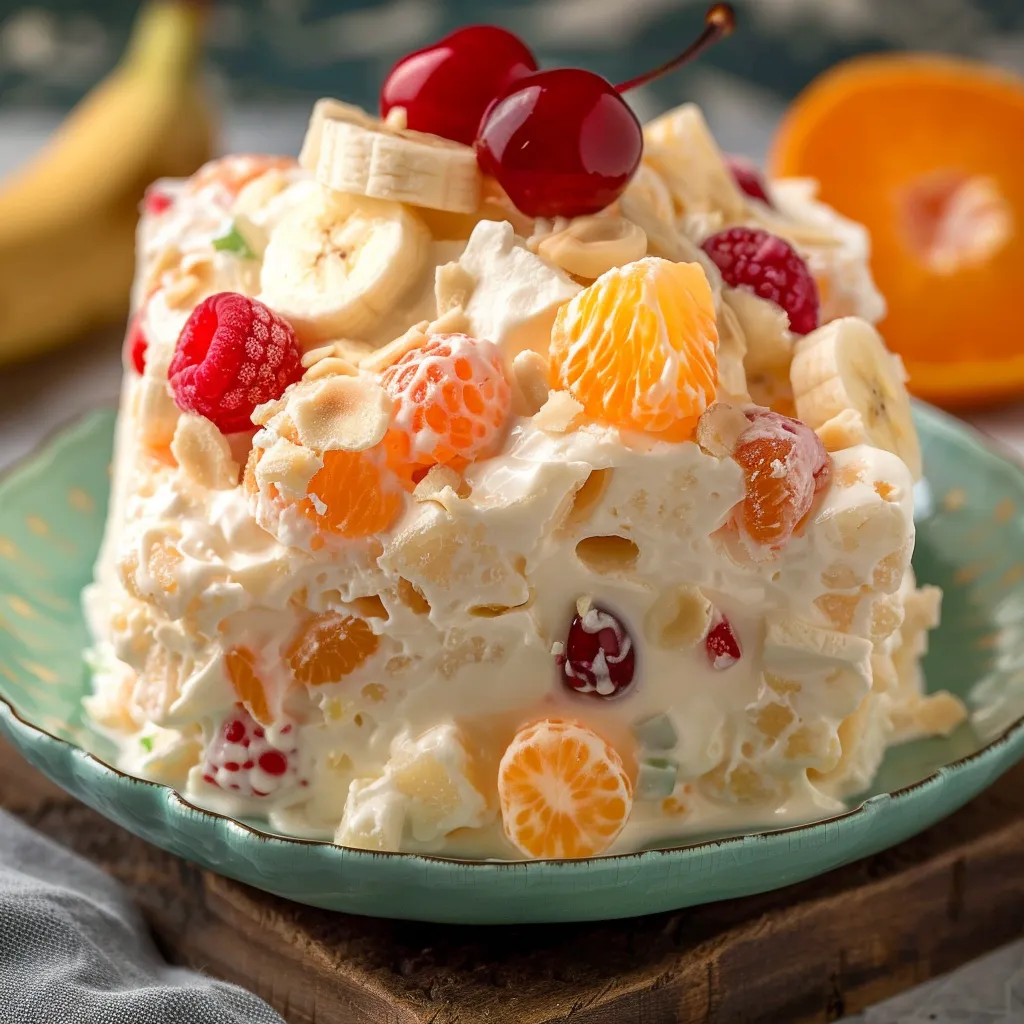
This creamy frozen fruit salad has been a cherished dessert in our family for generations, passed down from my grandmother who served it at every special occasion during hot summer months. The perfect balance of creamy texture and fruity sweetness makes it an irresistible treat that bridges the gap between dessert and salad.
I first tasted this recipe at my grandmother's house when I was just seven years old. The memory of helping her fold in the colorful fruits while she shared stories of her own childhood remains one of my fondest kitchen memories.
Ingredients
- Cream cheese: Provides the rich, tangy base that holds everything together
- Heavy cream: Whipped to soft peaks adds luxurious fluffiness and lightness
- Granulated sugar: Balances the tartness of the fruits without being overly sweet
- Crushed pineapple: Brings tropical sweetness and moisture
- Frozen strawberries or raspberries: Add vibrant color and bright flavor
- Mandarin oranges: Contribute juicy citrus notes and beautiful color contrast
- Chopped pecans: Introduce a delightful crunch and nutty dimension
- Maraschino cherries: Give festive pops of color and sweet nostalgia
- Bananas: Add creamy texture and natural sweetness
- Fresh lemon juice: Prevents banana browning and adds a hint of brightness
Step-by-Step Instructions
- Cream Base Preparation:
- Beat the softened cream cheese and sugar together in a large mixing bowl until you achieve a perfectly smooth consistency with no lumps. The cream cheese must be at room temperature for proper incorporation, so leave it out for at least 30 minutes before starting.
- Whipped Cream Incorporation:
- Gently fold the whipped cream into the cream cheese mixture using a rubber spatula with a light hand. Use a figure-eight motion to maintain the airiness of the whipped cream, which gives the salad its cloud-like texture.
- Fruit Addition:
- Add the well-drained pineapple, slightly thawed and chopped strawberries, and mandarin oranges to the creamy base. Fold these fruits in carefully to prevent crushing them while ensuring they're evenly distributed throughout the mixture.
- Texture Enhancement:
- Incorporate the chopped pecans and halved maraschino cherries into the mixture with gentle folding motions. The nuts and cherries should be evenly distributed to ensure every serving has these delightful elements.
- Banana Preparation:
- Toss the freshly sliced bananas in lemon juice in a separate small bowl, ensuring each slice is coated. This prevents browning and adds a subtle citrus note that complements the sweetness of the bananas.
- Final Assembly:
- Combine the banana slices with the fruit mixture using gentle folding motions. Transfer the completed mixture to a 9×13-inch pan, spreading it evenly with an offset spatula for a smooth, level surface.
- Freezing and Serving:
- Cover the pan tightly with plastic wrap or aluminum foil and freeze for at least 4 hours until firm. For serving, allow the salad to temper at room temperature for 10-15 minutes before cutting into squares with a warm knife for clean edges.
 Pin to Favorites
The maraschino cherries are what make this truly special to me. My grandmother would always let me place them strategically throughout the salad, claiming that whoever got a cherry in their serving would have good luck. That little tradition made this dessert magical in my childhood eyes.
Make-Ahead Magic
This frozen fruit salad is the ultimate make-ahead dessert for busy hosts. You can prepare it up to two weeks before your event and keep it frozen until needed. The freezing process actually enhances the flavors as they meld together over time. For best results, wrap the pan tightly with a layer of plastic wrap followed by aluminum foil to prevent freezer burn.
Seasonal Variations
While the classic recipe remains a family favorite, I've experimented with seasonal adaptations throughout the years. In summer, substitute fresh berries for frozen and add sliced peaches. For a fall version, incorporate diced apples and a sprinkle of cinnamon. Winter adaptations can include pomegranate seeds and orange segments for a holiday feel. The cream base remains constant while the fruits can change with the seasons.
Serving Suggestions
Transform this simple dessert into an elegant finale by serving each square on a chilled dessert plate with a dollop of whipped cream and a mint sprig. For a casual family gathering, scoop portions into decorative glasses and top with additional fresh fruit. Children particularly love when I serve this in waffle bowls with a light drizzle of chocolate sauce.
The History Behind The Dish
This recipe originated during the 1950s when refrigeration became commonplace in American homes and "congealed salads" were at the height of popularity. My grandmother clipped the original version from a women's magazine but modified it over the years to suit our family's taste preferences. What began as a practical way to use canned fruits during winter months became our signature family dessert that spans generations.
 Pin to Favorites
This timeless dessert blends creamy richness with fresh fruity sweetness—bringing joy to every occasion, year after year.
Frequently Asked Questions
- → Can I use fresh fruits instead of canned or frozen ones?
Yes, you can substitute fresh fruits like pineapple, strawberries, and oranges, but ensure they are well-drained to avoid excess liquid in the mixture.
- → How long does this frozen treat take to set?
The fruit salad needs at least 4 hours in the freezer to firm up properly. For best results, freeze it overnight.
- → Can I substitute nuts or leave them out?
Yes, you can omit the pecans or replace them with another nut, such as walnuts or almonds, for a different flavor and texture.
- → How should I store leftovers?
Store leftovers in an airtight container in the freezer. Let them thaw slightly at room temperature before serving again.
- → What’s the best way to prevent the bananas from browning?
Toss the banana slices in lemon juice before adding them to the mixture. This helps prevent discoloration and maintains their fresh flavor.
- → Can I make individual servings instead of a pan?
Absolutely! You can portion the mixture into small silicone molds or cupcake liners to make individual servings that are easy to grab and enjoy.