
 Pin to Favorites
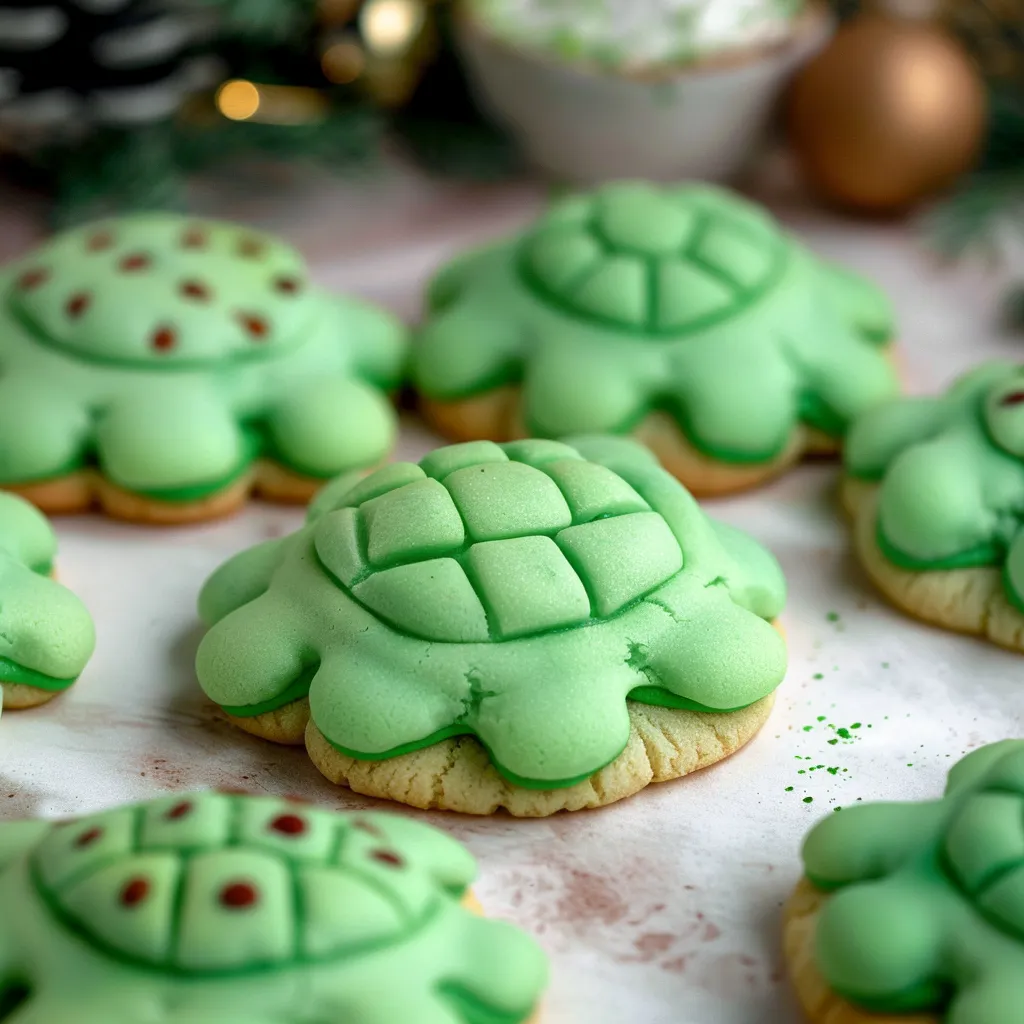
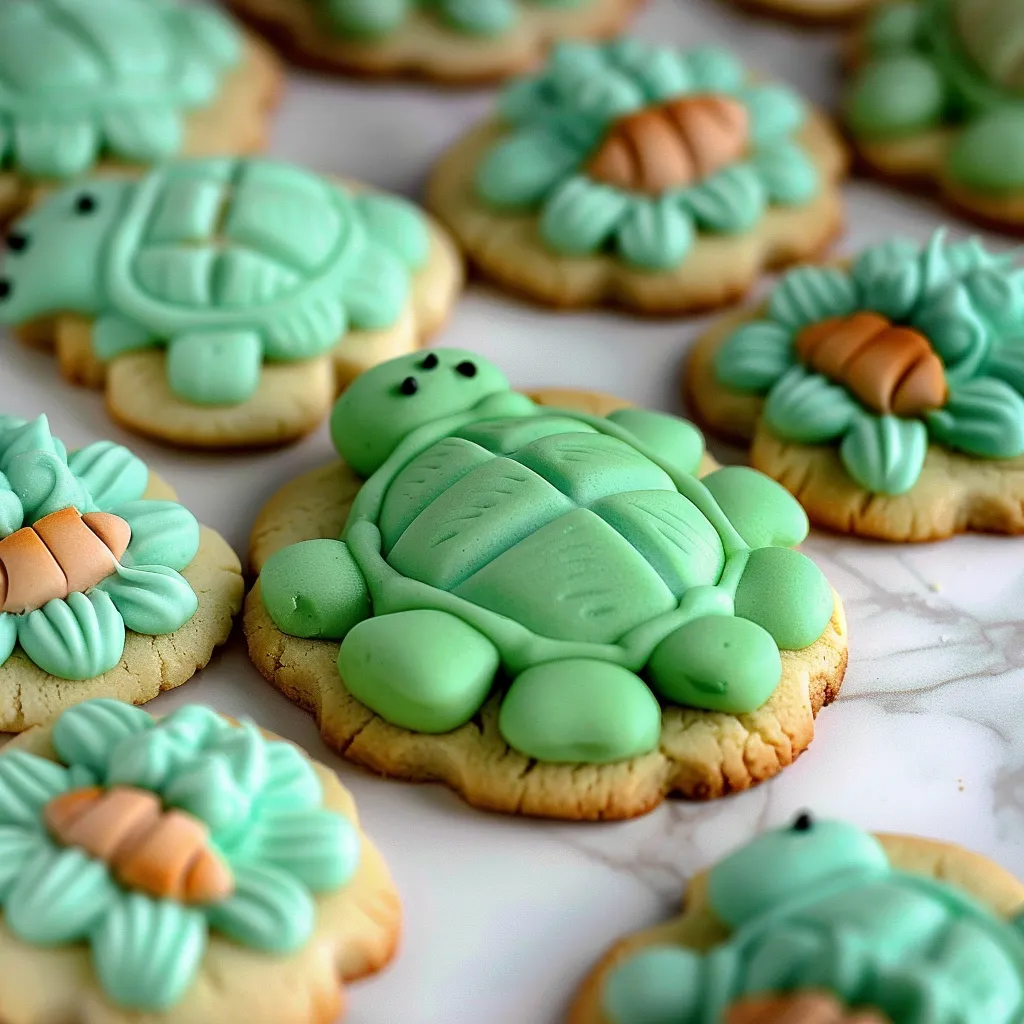
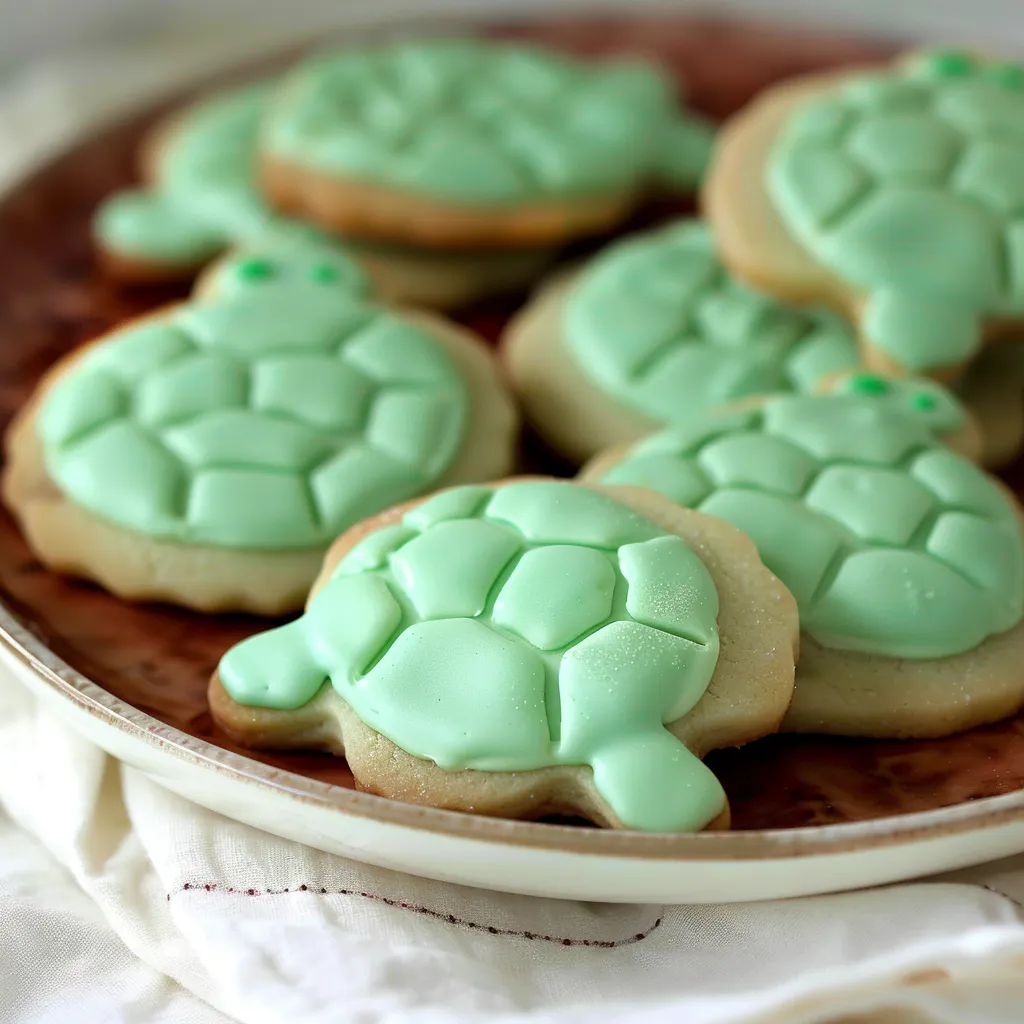
This adorable turtle sugar cookie recipe transforms classic sugar cookies into charming green reptiles that delight both kids and adults. The simple dough comes together quickly while the decorating process offers a fun activity for little helpers in the kitchen.
I first made these turtle cookies for my niece's reptile-themed birthday party, and they were such a hit that they've become my go-to treat for playdates and school functions. The joy on children's faces when they see these cute cookies is absolutely priceless.
Ingredients
- Sugar: Provides the perfect sweetness level and helps create the crisp exterior
- Butter: Softened to room temperature ensures a tender cookie texture
- Vanilla extract: Adds warm aromatic flavor that complements the sweetness
- Egg: Binds everything together while adding moisture
- All-purpose flour: Creates the sturdy base for these shaped cookies
- Baking powder and baking soda: Work together for the ideal rise and texture
- Salt: Enhances all the flavors and balances the sweetness
- Green gel food coloring: Gives the vibrant turtle color without thinning the dough
- Edible marker: For adding the final eye details
Step-by-Step Instructions
- Prepare Your Oven:
- Preheat your oven to 400ºF ensuring it reaches full temperature before baking. Position your rack in the center of the oven for even heat distribution. Prepare cookie sheets by lightly greasing or lining with parchment paper for easy removal.
- Mix Wet Ingredients:
- In a large mixing bowl combine sugar and softened butter, beating with an electric mixer on medium speed for about 3 minutes until light and fluffy. The mixture should be pale yellow and significantly increased in volume. Add vanilla and beat until incorporated, about 30 seconds.
- Add Egg:
- Add the egg to your sugar mixture and beat again until completely incorporated and smooth, about 1 minute. Make sure to scrape down the sides of the bowl to ensure everything is well mixed.
- Incorporate Dry Ingredients:
- Add flour, baking powder, baking soda, and salt to the wet mixture. Mix on low speed just until a smooth dough forms, about 1 to 2 minutes. Overmixing at this stage can make cookies tough, so stop once ingredients are combined.
- Add Food Coloring:
- Add green gel food coloring to the dough, starting with a small amount and gradually adding more until you reach your desired shade of turtle green. Beat until the color is completely uniform with no streaks. Gel coloring works best as it won't thin your dough.
- Form Turtle Bodies:
- Using a 1-tablespoon cookie scoop, portion the dough and roll into perfect spheres between your palms. Place the balls about 2 inches apart on your prepared cookie sheet as cookies will spread slightly during baking.
- Create Shell Pattern:
- Using the tines of a fork, press down on each dough ball in two different directions, creating a crisscross pattern that resembles a turtle shell. Press until cookies are about 1/2 inch thick, ensuring they are all uniform in thickness for even baking.
- Shape Heads and Feet:
- For each turtle body, roll a small pea-sized piece of dough for the head and four even smaller pieces for the feet. Gently attach these to the body, pressing lightly to secure them without flattening. The connection should be firm enough that they won't separate during baking.
- Bake to Perfection:
- Bake cookies for 5 to 7 minutes, watching carefully as they can brown quickly. The bottoms should just begin to turn golden while the tops remain soft. Cookies will continue to set as they cool so avoid overbaking for the perfect texture.
- Cool and Decorate:
- Transfer cookies to a wire cooling rack and allow to cool completely, about 15 minutes. Once cooled, use an edible marker to carefully draw small eyes on each turtle head, giving them personality and completing their adorable look.
 Pin to Favorites
My favorite part of making these cookies is watching children's creativity bloom as they help shape the turtles. My nephew once insisted on making a "grandpa turtle" with extra wrinkles pressed into the shell pattern, which has become a beloved family joke whenever we bake these together.
Storage Tips
These turtle cookies maintain their freshness remarkably well when stored properly. Keep them in an airtight container at room temperature with parchment paper between layers to prevent sticking. They'll stay soft and delicious for up to 5 days. For longer storage, freeze baked cookies in freezer bags for up to 3 months and thaw at room temperature when ready to enjoy.
Flavor Variations
While the classic green turtle is charming, you can easily adapt this recipe for different occasions. Try adding 1/2 teaspoon of almond extract for a subtle nutty flavor or 1 teaspoon of lemon zest for a bright citrusy twist. For chocolate lovers, fold in 1/3 cup of mini chocolate chips into the dough before coloring. You can even create rainbow turtles by dividing the dough and using different colors for a unicorn or rainbow-themed party.
Troubleshooting Common Issues
If your turtle parts aren't sticking properly, try lightly brushing the connection points with a small amount of water before attaching. This creates a gentle "glue" that helps parts stay connected during baking. If your cookies spread too much during baking, your butter might be too warm — chill the shaped cookies for 15 minutes before baking. And if the color isn't vibrant enough, remember that gel food coloring produces much stronger results than liquid alternatives with less impact on dough consistency.
 Pin to Favorites
These cookies bring joy to both the baker and the eater — perfect for creating memorable moments!
Frequently Asked Questions
- → How do I get the green color for the cookies?
You achieve the green color by adding green gel food coloring to the cookie dough. Start with a small amount and add more as needed until you get the desired shade.
- → How do I shape the cookies into turtles?
Roll the dough into round balls for the turtle bodies, then press down with a fork to create a shell pattern. Roll small bits of dough for the head and feet, and attach them gently to the body.
- → Can I use liquid food coloring instead of gel?
It's best to use gel food coloring because it has a stronger pigment and doesn’t alter the dough's consistency. Liquid food coloring might make the dough too wet.
- → What should I do if the dough is too sticky to shape?
If the dough feels sticky, you can chill it in the refrigerator for 15-20 minutes before shaping. This will make it easier to work with.
- → How do I know when the cookies are baked?
The cookies are done when their bottoms just begin to brown, which typically takes 5-7 minutes at 400ºF. Don't overbake to keep them soft and chewy.
- → Can I decorate the cookies differently?
Absolutely! You can use candy eyes or other edible decorations instead of drawing them on with markers. Let your creativity guide you!