
 Pin to Favorites
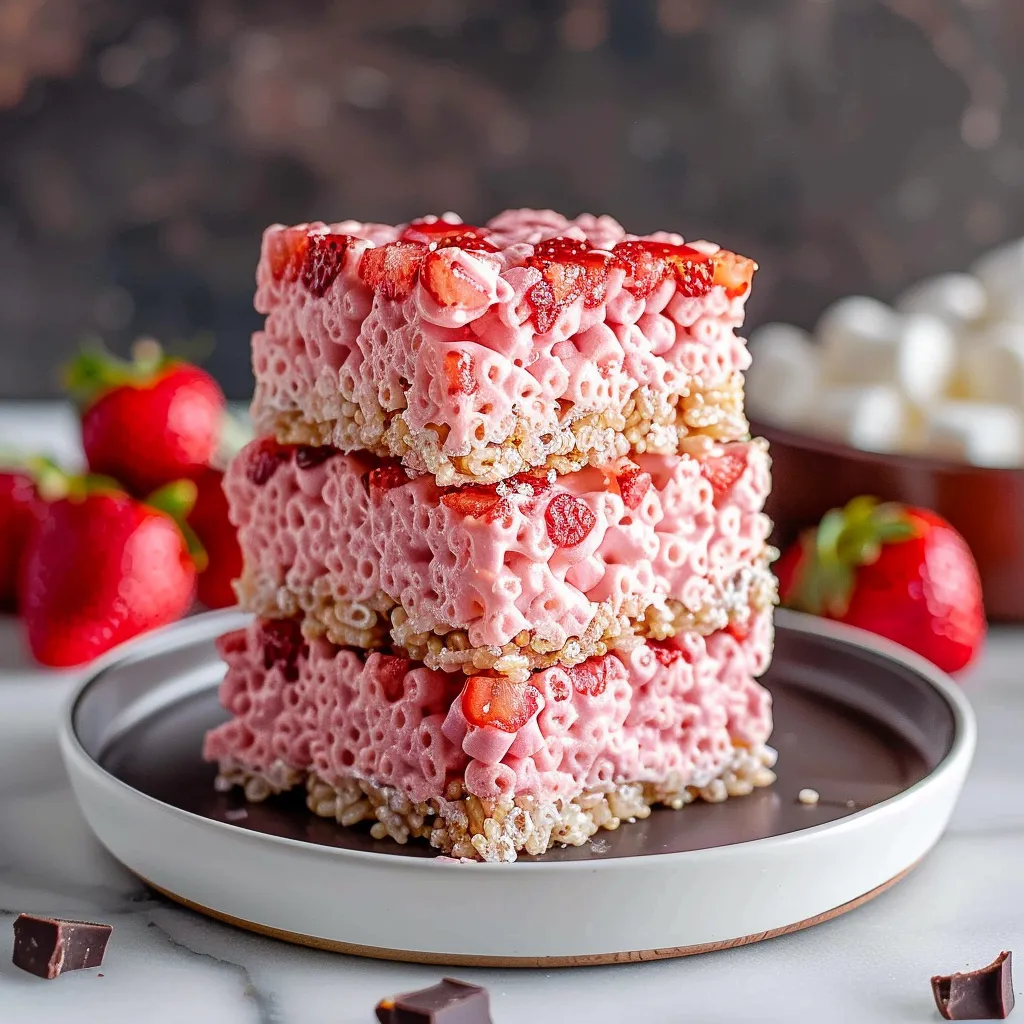
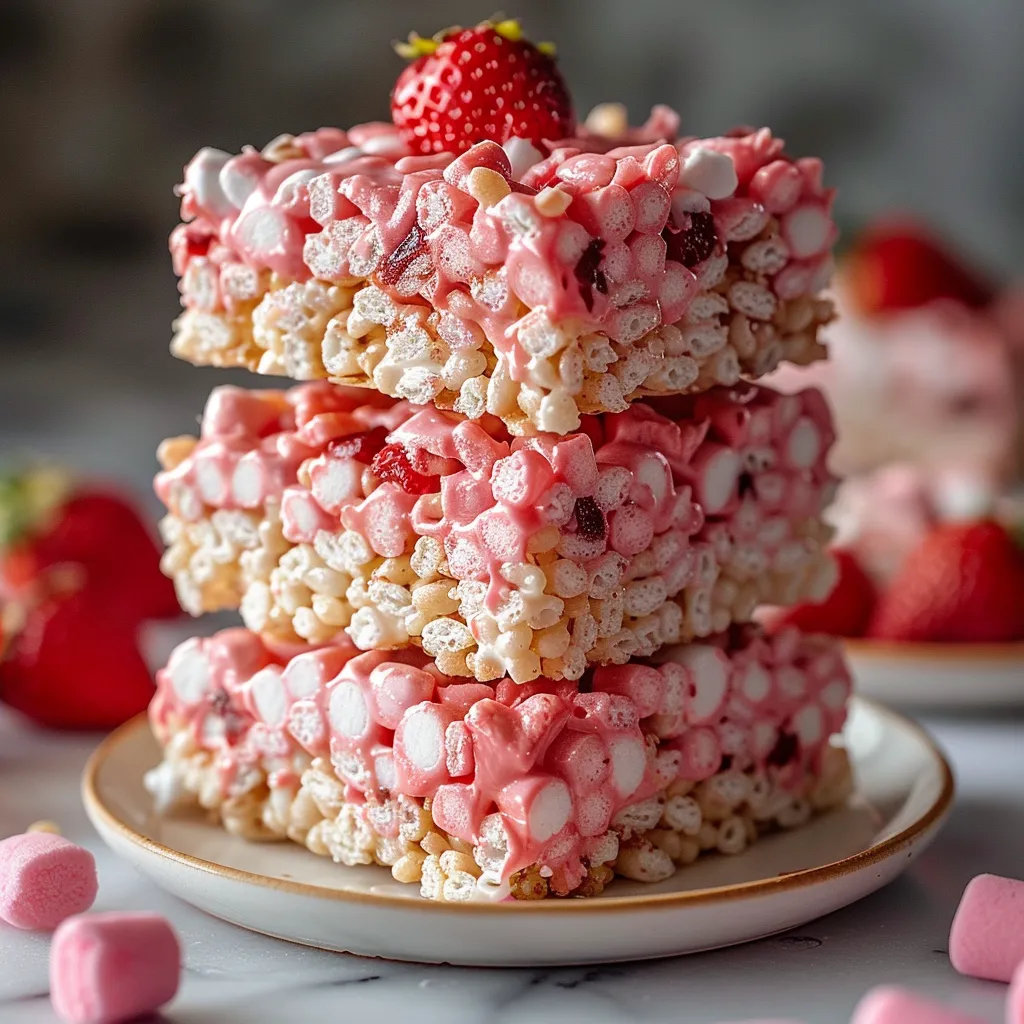
This homemade strawberry rice krispie treats recipe transforms the classic childhood favorite into something extra special with real strawberry flavor from freeze-dried berries and a decadent chocolate topping. The beautiful pink color makes these perfect for Valentine's Day, baby showers, or anytime you want to elevate a simple dessert.
I first made these for my daughter's birthday party when I needed something that would impress without keeping me in the kitchen all day. The pink hue and chocolate topping had both kids and adults reaching for seconds.
Ingredients
- Freeze dried strawberries: Pulverized into powder for concentrated natural flavor without adding moisture
- Unsalted butter: Creates the perfect base for the gooey marshmallow mixture
- Mini marshmallows: Melt more evenly than regular marshmallows for the perfect texture
- Crispy rice cereal: Provides the signature crunch and structure
- Dark chocolate: Adds richness and visual appeal feel free to substitute milk or white chocolate
Step-by-Step Instructions
- Prepare the Pan:
- Lightly grease a 9x13 inch baking pan with cooking spray or butter. This prevents sticking and makes removal effortless later. If you prefer thicker treats, use a 9x9 inch pan instead but remember this will require adjusting serving sizes.
- Create Strawberry Powder:
- Add freeze dried strawberries to a food processor or high powered blender and pulse until they transform into a fine powder. This powder will infuse every bite with intense strawberry flavor and create that beautiful pink color throughout the treats.
- Melt the Base:
- In a large saucepan melt butter over low heat being careful not to brown it. Low heat is crucial here as higher temperatures can cause the marshmallows to seize or burn creating an unpleasant texture.
- Combine Marshmallows:
- Add mini marshmallows to the melted butter and stir gently with a silicone spatula. Continue stirring constantly to prevent sticking or burning until the marshmallows are about 80 percent melted.
- Incorporate Strawberry Flavor:
- Add the strawberry powder to the nearly melted marshmallow mixture. Stir gently to incorporate fully as the powder dissolves into the mixture. The vibrant pink color will develop as you mix. Small strawberry pieces add flavor bursts and visual interest.
- Add Cereal:
- Remove the pan from heat completely before adding cereal. Working quickly add the crispy rice cereal one cup at a time stirring between additions until every piece is coated with the pink marshmallow mixture. This gradual approach ensures even coating without crushing the cereal.
- Transfer and Press:
- Pour the mixture into your prepared pan. Lightly grease your hands with cooking spray or butter to prevent sticking then gently press the mixture into an even layer. Avoid pressing too firmly which can make treats dense and hard rather than pleasantly chewy.
- Prepare Chocolate Topping:
- Finely chop chocolate to ensure even melting. Place in a microwave safe bowl and heat on medium power not high in 45 second intervals stirring thoroughly between each interval until completely smooth and glossy.
- Add Chocolate Layer:
- Pour the melted chocolate over the rice krispie base spreading it into an even layer with an offset spatula or the back of a spoon. The warm chocolate will slightly soften the top layer of the treats creating a perfect bond.
- Set and Slice:
- Allow treats to set at room temperature until the chocolate has completely hardened. Using a sharp knife cut into squares or rectangles. For the cleanest cuts warm the knife under hot water and wipe dry between slices.
 Pin to Favorites
The freeze dried strawberries are truly the secret weapon in this recipe. I discovered them by accident when I needed strawberry flavor without the moisture and now keep them on hand year round. My husband who normally passes on desserts always steals one of these from the container before they even make it to the serving plate.
Storage Instructions
These strawberry rice krispie treats stay fresh at room temperature in an airtight container for up to 3 days. If you live in a particularly warm climate store them in the refrigerator but allow them to come to room temperature before serving for the best texture experience. I recommend placing parchment paper between layers if stacking to prevent the chocolate from sticking to the treats below.
Seasonal Variations
Change up these treats throughout the year by using different freeze dried fruits. Try blueberry for a purple hue or raspberry for a deeper red color. You can even combine fruits for custom flavors. During holiday seasons add festive sprinkles into the mixture or over the chocolate while still wet for a decorative touch that requires no extra effort.
Serving Suggestions
While delicious on their own these strawberry treats pair wonderfully with fresh berries on the side or a scoop of vanilla ice cream for a more decadent dessert. For parties cut them into small one inch squares and arrange on a tiered serving platter with fresh strawberries for an elegant presentation that requires minimal effort.
 Pin to Favorites
These strawberry rice krispie treats are simple to make yet packed with flavor and charm. A perfect crowd-pleaser for any occasion.
Frequently Asked Questions
- → Can I use fresh strawberries instead of freeze-dried?
Fresh strawberries contain moisture, which can make the treats soggy. Freeze-dried strawberries work best for maintaining the right texture.
- → What type of chocolate works best for the topping?
You can use dark, milk, semi-sweet, or white chocolate, depending on your preference. Dark chocolate balances the sweetness beautifully.
- → Can I make these treats without marshmallows?
Marshmallows are essential for binding the mixture together. However, you can experiment with nut butter or honey as substitutes, though the texture may vary.
- → How do I prevent the treats from sticking to my hands while pressing?
Lightly grease your hands with butter or oil to prevent sticking when pressing the mixture into the pan.
- → What is the best way to store these treats?
Store in an airtight container at room temperature for up to 3 days. Avoid refrigeration, as it can make the bars too hard.