
 Pin to Favorites
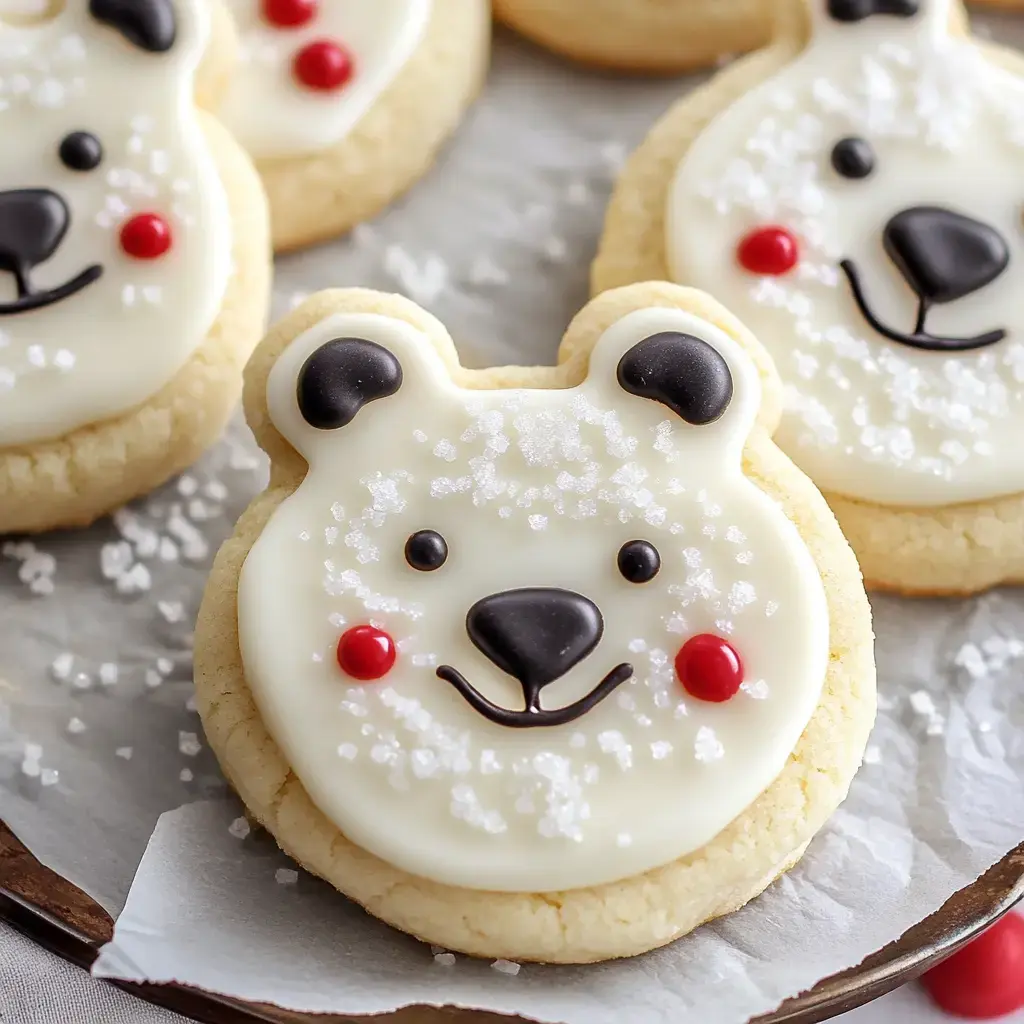
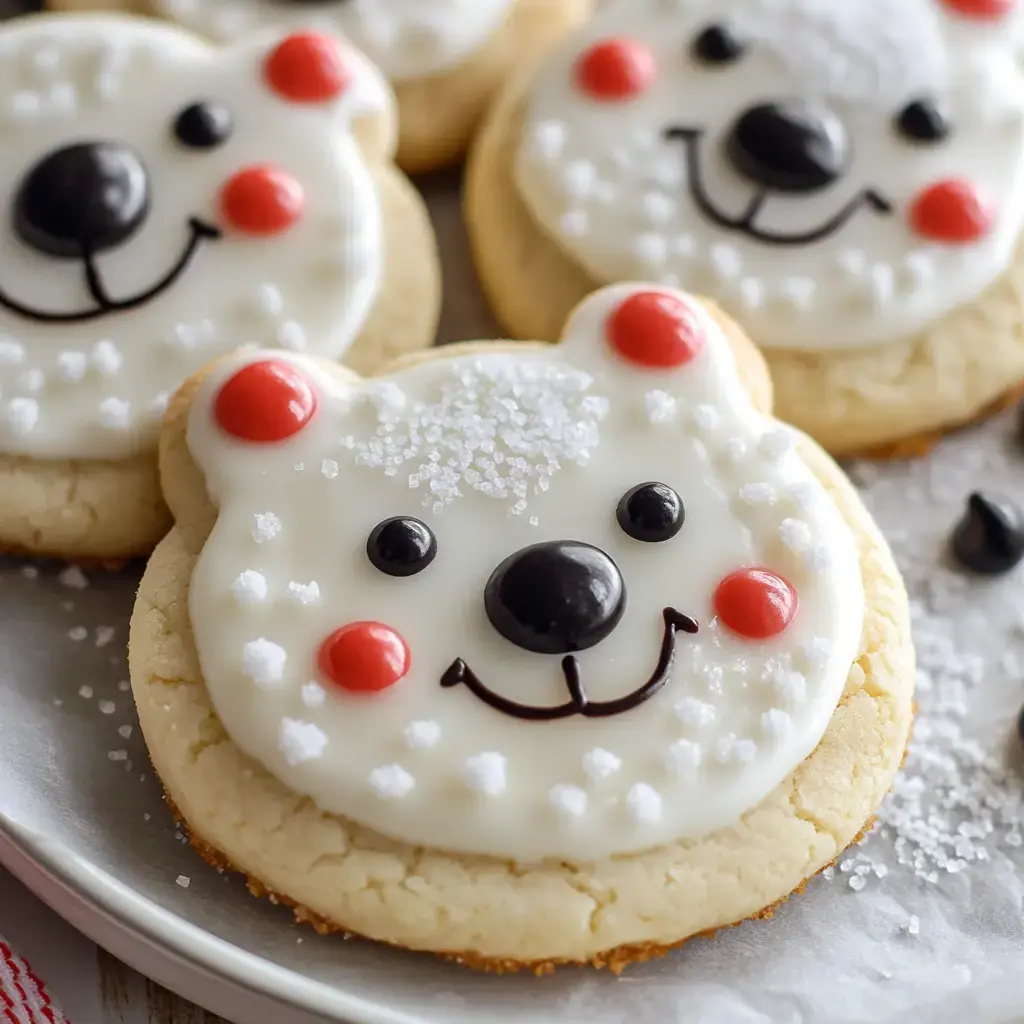
Every holiday season I get excited to make these adorable Polar Bear Cookies. They started as a fun experiment with my kids and turned into our most beloved holiday tradition. These soft cream cheese cookies topped with fluffy buttercream are like little works of art that happen to taste amazing. When people see them they can't help but smile it's impossible to resist their cute polar bear faces.
What Makes These Cookies Special
The magic of these cookies is how they combine the perfect cookie texture soft and creamy from the cream cheese with that sweet cloud-like buttercream frosting. They're fun to make beautiful to look at and absolutely delicious. Every time I bring them to a holiday party they're the first treats to disappear from the dessert table.
Getting Ready to Bake
- Essential Tools: Round cookie cutters are your best friends here along with good baking sheets and parchment paper. I love using my stand mixer but a hand mixer works great too.
- Key Ingredients: The cream cheese and butter need to be perfectly soft real vanilla makes such a difference and don't skip the cornstarch it gives these cookies their melt-in-your-mouth texture.
Let's Make Some Polar Bears
- Making That Perfect Dough
- I start with super soft cream cheese and butter they need to be room temperature to blend perfectly. When you mix them with sugar it gets so light and fluffy. The dry ingredients go in next and then comes the hardest part waiting while it chills!
- Shaping Our Bears
- Rolling the dough is like creating little polar bear canvases. I use a bigger circle for the face and two tiny ones for ears. The trick is pressing those ears on gently they'll bond while baking.
- Baking Time
- That extra chill before baking is crucial they hold their shape better. I watch them like a hawk in the oven you want them just barely golden around the edges. When they cool they'll be perfectly soft and tender.
- The Fun Part - Decorating
- This is where these cookies come alive! That white buttercream goes on first then a quick dip in sparkling sugar makes them look frosty. Those little chocolate chip eyes and sprinkle noses transform them into the cutest polar bears you've ever seen.
Making Them Your Own
I love how flexible this recipe is. Sometimes I make them dairy-free for friends using vegan butter and they're still amazing. The frosting works great with coconut cream too. You can even use gluten-free flour just make sure it's a blend with xanthan gum for the right texture.
My Best Tips
After making these countless times I've learned some important tricks. Keep your dough the same thickness all over they'll bake more evenly that way. Don't skip the chilling steps trust me on this one. And when it comes to decorating let your creativity shine each bear can have its own personality.
Keeping Them Fresh
These cookies keep beautifully but timing is everything. Once they're frosted they'll stay perfect for a couple days at room temperature just keep them in an airtight container. If you need them to last longer pop them in the fridge they'll stay fresh for almost a week. I love making the dough ahead and freezing it when life gets busy having cookie dough ready to go is like having a baking superpower.
Worth Every Moment
Making these polar bear cookies might take a little more time than regular cookies but the joy they bring makes it all worthwhile. There's something so special about seeing a plate of these adorable bears all lined up each one with its own unique expression. They're not just cookies they're little edible pieces of art that make people happy.
Getting Creative
Let me share some fun decorating ideas I've discovered. Sometimes I use tiny fondant hearts for the noses or edible markers to draw different expressions. During Christmas I'll add tiny red and green sprinkles to make them festive. My kids love giving each bear its own personality some look surprised others sleepy it's like creating tiny edible characters.
Perfect for Gifting
These polar bears make the sweetest gifts. I carefully pack them in holiday tins lined with parchment paper making sure to layer them gently. Sometimes I'll include the recipe because people always ask for it. Nothing says "I made this just for you" like a box of handmade polar bear cookies each one decorated with care. They're especially magical when given to families with little ones their faces light up at the sight of these adorable treats.
Baking with Little Helpers
Some of my favorite memories are making these cookies with kids. Little hands are perfect for cutting out the circles and pressing on those tiny ears. The decorating part is where the real fun happens though. I set up a little decorating station with all the sprinkles and candies and let them get creative. Yes it gets messy but those giggles and proud smiles are worth every bit of cleanup.
Beyond Polar Bears
While I love the polar bear design this dough is amazing for any shape you can imagine. During different seasons we turn them into snowmen reindeer or even little penguins. The cream cheese dough holds its shape beautifully and that white frosting works as a perfect canvas for whatever design you dream up. It's like having one perfect recipe that can transform for any occasion.
What Makes Them So Special
These polar bear cookies have become more than just a dessert they're part of so many special moments. I've served them with steaming mugs of hot chocolate watching kids eyes go wide at their first sight of these adorable treats. At holiday parties they're always a conversation starter everyone wants to know how they're made and share their own cookie traditions. It's amazing how a simple cookie can bring people together and create such joy.
Setting the Perfect Scene
When I'm hosting holiday gatherings I love creating a special display for these cookies. Sometimes I'll arrange them on different height cake stands surrounded by fake snow or sparkly decorations. A pot of spiced cider or hot cocoa nearby makes the perfect pairing. For children's parties I might set up a cookie decorating station letting little ones add their own special touches to plain frosted bears. It's those little extra touches that turn a simple cookie into a memorable experience.
 Pin to Favorites
Conclusion
These adorable polar bear cookies combine a soft cream cheese sugar cookie base with vanilla buttercream frosting and cute decorative details. Perfect for winter celebrations!Frequently Asked Questions
- → Can I make these cookies ahead of time?
- Yes, the decorated cookies can be stored for 2 days at room temperature, 5 days in the fridge, or frozen for up to a month. The dough can also be frozen for up to a month.
- → Why chill the dough multiple times?
- Chilling helps prevent spreading during baking and creates softer cookies. Chilling after cutting ensures the shapes stay crisp and defined.
- → Can I stack these cookies?
- Yes, but chill them thoroughly first and place parchment paper between layers. The buttercream will firm up when chilled but won't set completely hard.
- → What if I don't have the exact sprinkles or decorations?
- Feel free to improvise with what you have. You can use different sprinkles or even fondant to create the facial features.
- → Can I halve this recipe?
- Yes, you can halve all ingredients (use half a scrambled egg), but don't double it unless you have a commercial-sized mixer.