
 Pin to Favorites
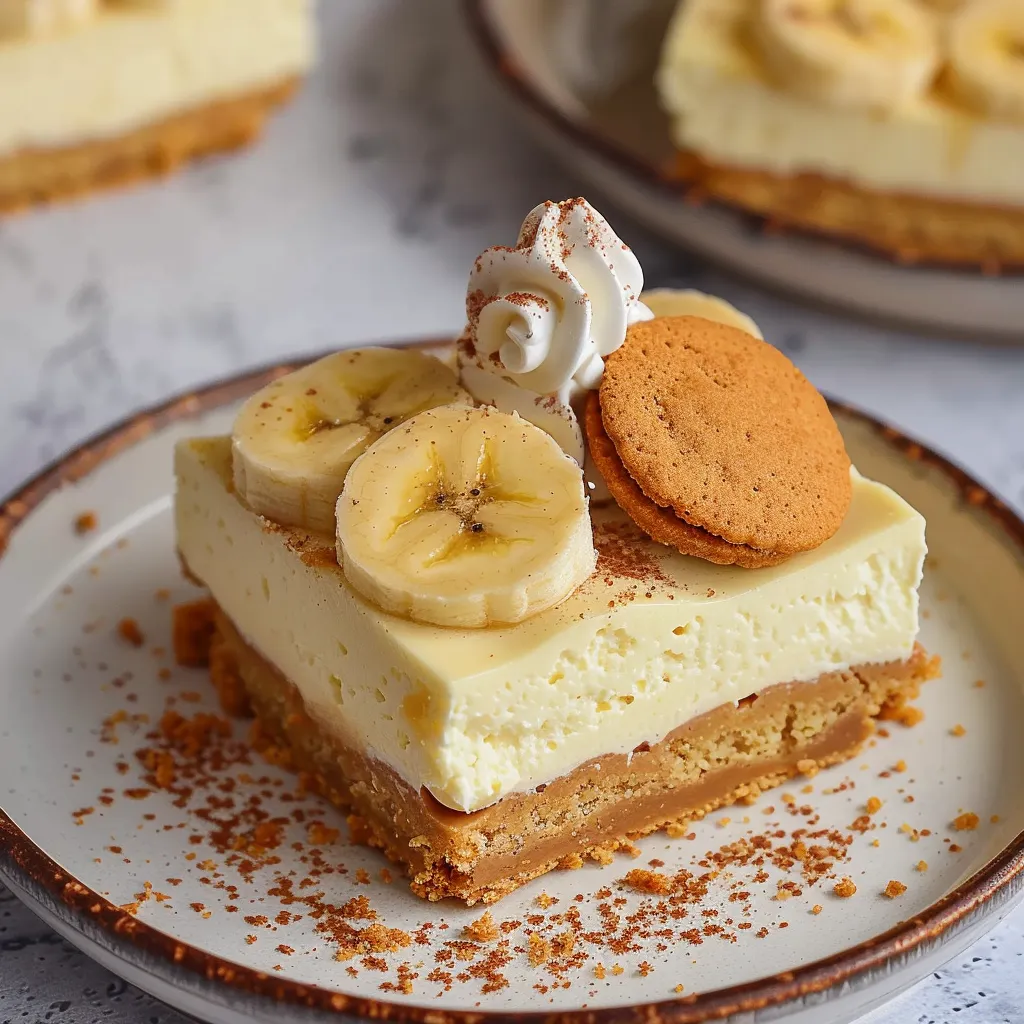
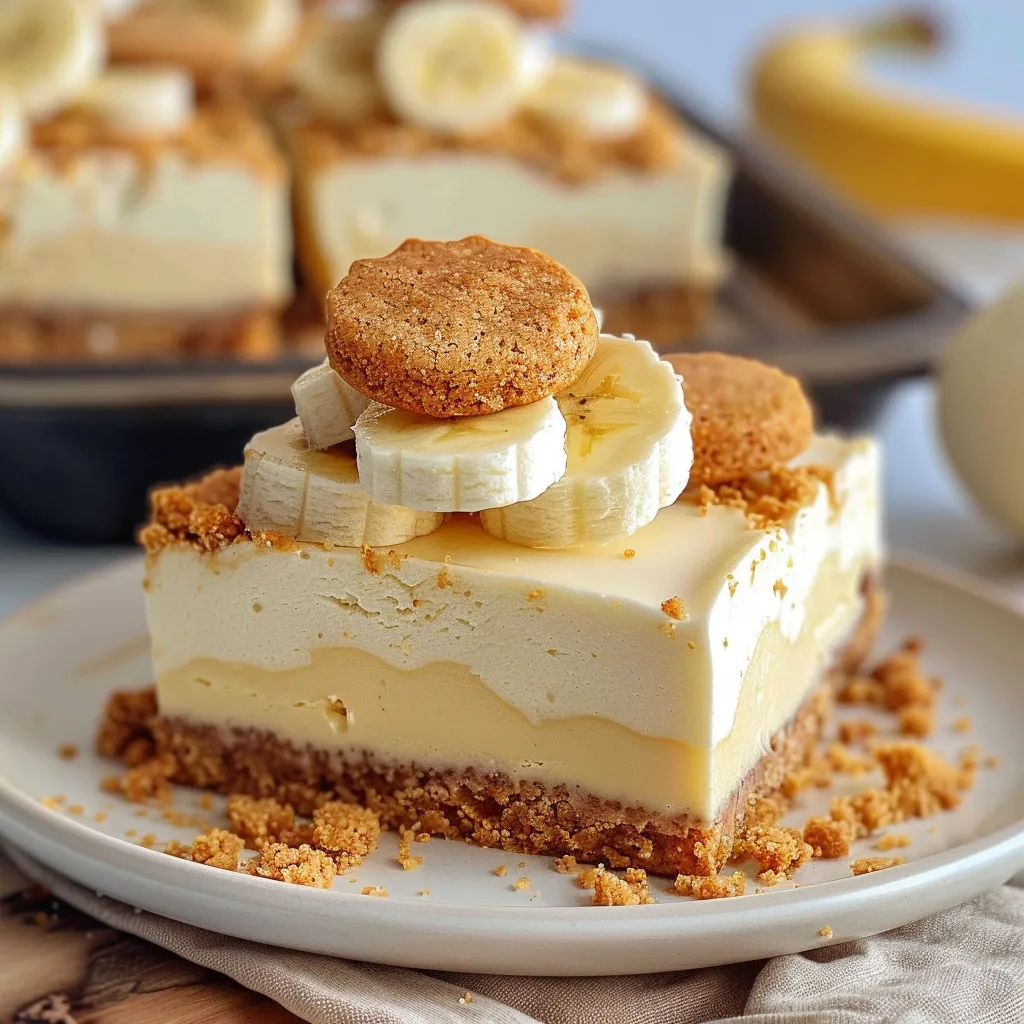
The first bite of Banana Pudding Cheesecake Bars delivers a perfect harmony of creamy richness and nostalgic banana flavor that transports you straight to summer gatherings and family celebrations. The buttery vanilla wafer crust provides a delightful contrast to the silky-smooth filling, while the subtle tanginess of cream cheese balances the sweet banana pudding perfectly. These bars beautifully blend two beloved desserts into something altogether new yet comfortingly familiar—a no-bake treat that feels simultaneously indulgent and refreshing.
Last summer, I brought these to a backyard barbecue, and they disappeared faster than any other dessert. Even my brother-in-law, who typically avoids sweets, asked for the recipe, which is perhaps the highest compliment a dessert can receive.
Essential Ingredients and Selection Tips
- Cream Cheese: Use full-fat, block-style cream cheese for proper consistency and flavor. Philadelphia brand is my go-to for its reliable texture and balanced tanginess.
- Instant Banana Pudding Mix: Jell-O brand provides the most consistent results and pronounced banana flavor. The instant variety (not cook-and-serve) is crucial for this no-bake application.
- Vanilla Wafers: Traditional Nilla wafers create the most authentic flavor profile, though any crisp vanilla cookie works.
- Heavy Whipping Cream: Look for cream with at least 36% butterfat for the best whipping properties and richest texture.
 Pin to Favorites
Detailed Cooking Instructions
- Prepare the Pan:
- Line an 8-inch square baking dish with parchment paper, leaving overhang for easy removal.
- Create the Cookie Base:
- Crush 45-50 vanilla wafers into fine crumbs (about 2 cups). Mix with 2 tbsp brown sugar, a pinch of salt, and 6 tbsp melted butter. Press into the pan and chill for 20-30 minutes.
- Prepare Cream Cheese Base:
- Beat 16 oz softened cream cheese with ½ cup sugar until smooth. Add ½ cup sour cream and 1 tsp vanilla extract, mixing until incorporated.
- Create Pudding Mixture:
- Whisk together 1 cup cold heavy whipping cream and one 3.4 oz package of instant banana pudding mix until thick.
- Combine Filling Components:
- Gradually fold the pudding mixture into the cream cheese mixture until smooth and well combined.
- Assemble and Chill:
- Pour the filling over the chilled crust, smoothing the top. Cover with plastic wrap and refrigerate for at least 8 hours or overnight.
- Slice and Garnish:
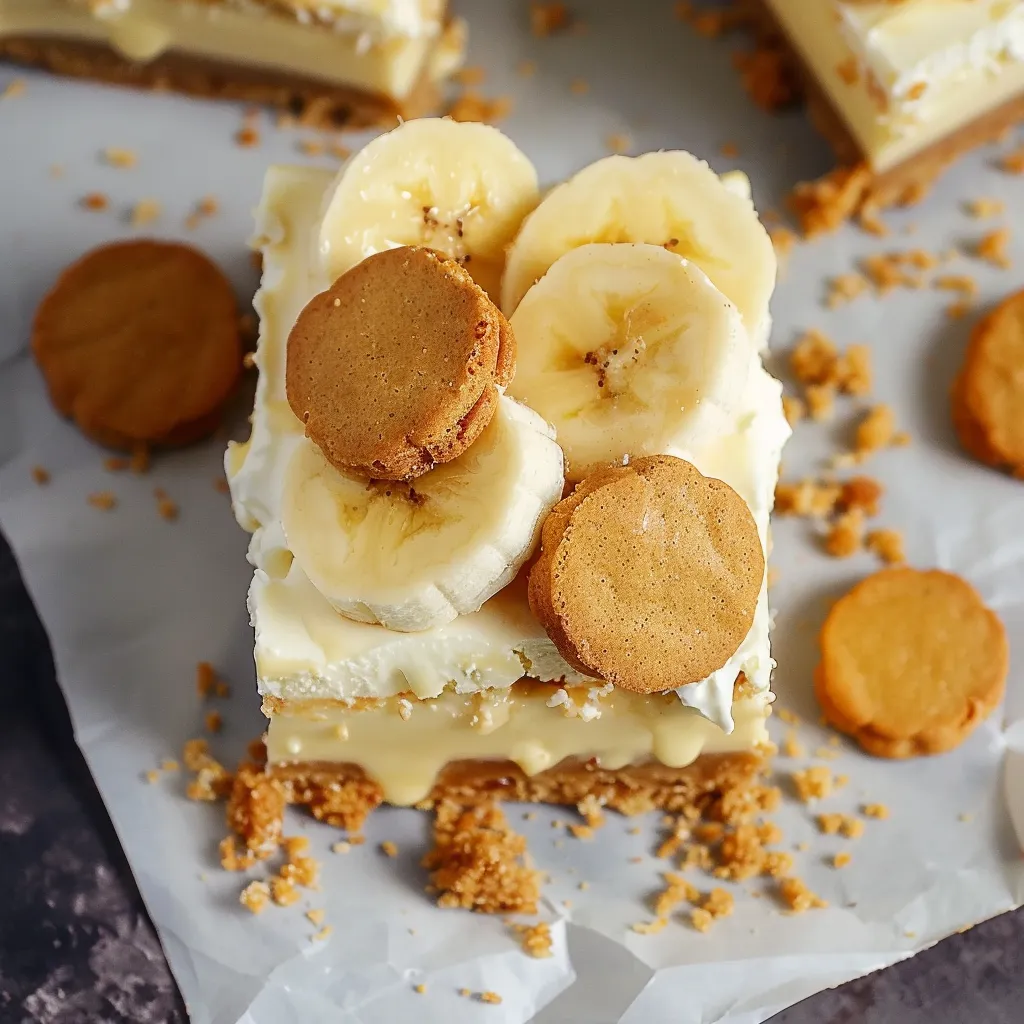
- Lift out the set bars using the parchment overhang. Cut into 16 squares and top with banana slices, whipped cream, and a vanilla wafer just before serving.
The first time I made these, I didn't allow the cream cheese to soften completely and ended up with tiny lumps throughout the filling. Now I make sure to plan ahead, letting the cream cheese sit out for at least an hour before beginning.
The balance between cream cheese and banana pudding is crucial. Too much pudding creates an artificial taste, while too little leaves the bars tasting like plain cheesecake. After much experimentation, I've found that using a full package of pudding mix provides the ideal banana intensity without becoming cloying.
Garnishing options allow for customization while maintaining the dessert's integrity. While fresh banana slices add authentic flavor and visual appeal, caramelized banana slices make an elegant topping for special occasions.
Make-ahead convenience makes these bars perfect for entertaining. They actually improve after 24 hours of refrigeration as the flavors meld and develop.
These bars beautifully blend culinary traditions of classic Southern banana pudding with the New York-style cheesecake. The original banana pudding recipe, featuring layers of vanilla wafers, sliced bananas, and custard, dates back to the late 19th century and became an American staple.
What makes these Banana Pudding Cheesecake Bars truly special is their ability to appeal to diverse palates. The familiar banana pudding flavor attracts those who might typically avoid cheesecake's tanginess, while the cream cheese component elevates it beyond simple pudding.
The joy of sharing these bars comes not just from their delicious flavor but from watching people's reactions to that first bite—the moment of recognition as they taste a familiar childhood favorite transformed into something more sophisticated.
 Pin to Favorites
Frequently Asked Questions
- → Can I make these No Bake Banana Pudding Cheesecake Bars ahead of time?
- Yes! These bars actually need at least 8 hours to set up properly in the refrigerator, making them a perfect make-ahead dessert. You can prepare them up to 2 days in advance and add the fresh banana slices just before serving.
- → How long do these cheesecake bars last in the refrigerator?
- These cheesecake bars will last 3-4 days in the refrigerator when stored in an airtight container. Add the fresh banana slices only when serving to prevent them from browning.
- → Can I freeze these No Bake Banana Pudding Cheesecake Bars?
- Yes, you can freeze the bars without the fresh banana topping for up to 2 months. Wrap them tightly in plastic wrap and place in a freezer-safe container. Thaw overnight in the refrigerator before serving.
- → What size of banana pudding mix should I use?
- The recipe calls for one 3.4-ounce box of instant banana pudding mix, which is the standard small box size available in most grocery stores.
- → Can I substitute graham crackers for the vanilla wafers in the crust?
- Yes, you can substitute graham cracker crumbs for the vanilla wafer crumbs in a 1:1 ratio. However, the vanilla wafers provide that classic banana pudding flavor that pairs perfectly with the filling.